Gluten Free Penguins
I seem to be on a bit of a mission to make gluten/dairy free versions of EVERYTHING I can’t have from Twix Bars to Artic Rolls (big list at the bottom)… these Gluten Free Penguins were next on my list & whilst it has taken me some time to get the biscuit right, it’s definitely been worth it. They are perfect – if I do say so myself 😉
Warning: one bite and you’ll be addicted so make at your own risk! I’m on my 3rd batch this week and its only Wednesday.


Not only do my homemade gluten free penguins taste better than the real thing (especially the white ones!), they also come with a massive sense of satisfaction that will put a big smile on your face… “I made these!!!”
Ingredients & Equipment
It looks like there’s a lot of steps involved, but I promise my gluten free penguins are super easy to make!!
For the butter in the biscuits, I highly recommend using a block of Stork (comes in a yellow foil wrapper with “for biscuits” written on it). You won’t get the perfect biccy with a spread.

Here’s all the equipment you’ll need… there’s nothing complicated…so get cracking!

Let me know what you think of my gluten free penguins!!

Gluten Free Penguins
Ingredients
Biscuits
- 340 grams gluten free plain flour
- 1 beaten egg
- 80 grams dairy-free butter - I use a block of Stork
- 80 grams caster sugar
- 85 grams golden syrup
- 5 grams cocoa powder
Construction
- 15 grams cocoa powder
- 125 grams icing sugar
- 85 grams dairy-free spread/butter - I like Flora Dairy free spread but you could also use a block like Stork
- 300-350 grams chocolate of your choice - 400g if you like to lick the spoon!
Instructions
Biscuits
- Whisk the butter & sugar together until fully combined (takes about 30 seconds with an handheld electric whisk).
- Add the golden syrup & beaten egg to the same bowl and whisk until fully combined. It may look a little scrambled at first (depending on the softness of your butter etc), but keep whisking until its relatively smooth, like the picture. Takes roughly 30 seconds.

- Add the flour & cocoa powder and whisk again until combined (so the white from the flour has all gone)- roughly 30-40 secs.

- Use your hands to bring it together. Cover the bowl with cling film and leave in the freezer for at least 45mins to firm up.

- When its firm, remove from the freezer and knead for about 30 secs (just play with it in your hands) until it becomes smooth and a less crumbly – like playdough. >How do you know when its firm enough? You should be able to make a little ball in your hands and flatten it out without it sticking to your fingers.

- Preheat your oven to 140oC (fan).
- Sprinkle plenty of flour over your rolling pin and work surface. Roll out the dough to 3-5mm thick, or a £1 coin. Cut into 28 roughly equal sized rectangles (I used 2/3 of a post-it note as my guide for each rectangle). >You might find it easier to divide the ball of dough into 3 or 4 and work with a portion at a time.

- Place all your rectangles onto a sheet of baking paper on a baking tray. Don't worry about spacing them out as they won't really expand.

- Place into the oven for 25 mins. >They wont really "brown around the edges" like normal biscuits, so just stick to this time as your guide for when they're done.
- Leave to cool completely (takes around 20 mins). They'll cool quicker on a cooling rack but it isn't necessary if you haven't got one.

Construction
- To make the buttercream filling, whisk together the spread, icing sugar and cocoa powder until fully combined and smooth.
- Pair up the cooled biscuits so you have 2 of roughly the same size together.
- Take 1 biscuit. Add approx 2 tsp of buttercream to the underside. Carefully spread it right to the edges – like toast! >It can be best to keep the biscuit you are coating on the work surface whilst you add the buttercream as they are very thin and break easily. If they do break, don't worry… just put the pieces back together again. They'll be coated in chocolate anyway!!

- Place the biscuit it was paired with on top. Lightly push them together until the buttercream just starts coming out the sides. Use your little finger to scrap off any excess buttercream & make it have the traditional penguin sandwich ridge in the middle.

- Melt the chocolate (I do this in a bowl over a pan of simmering water – don't let the hot water touch the bottom of the bowl, otherwise you'll burn your chocolate).
- Dip the edges of the penguins in the chocolate. Place on a cooling rack.

- Add 1 tsp of melted chocolate on top of each and spread around to cover the top (use the back of your spoon – doesn’t have to be neat).

- Place in the fridge for 5 mins to harden.
- Turn them over and add another tsp of melted chocolate to cover the remaining biscuit.
- Leave to set (in the fridge/freezer if you're feeling impatient) and then eat!!!
Notes
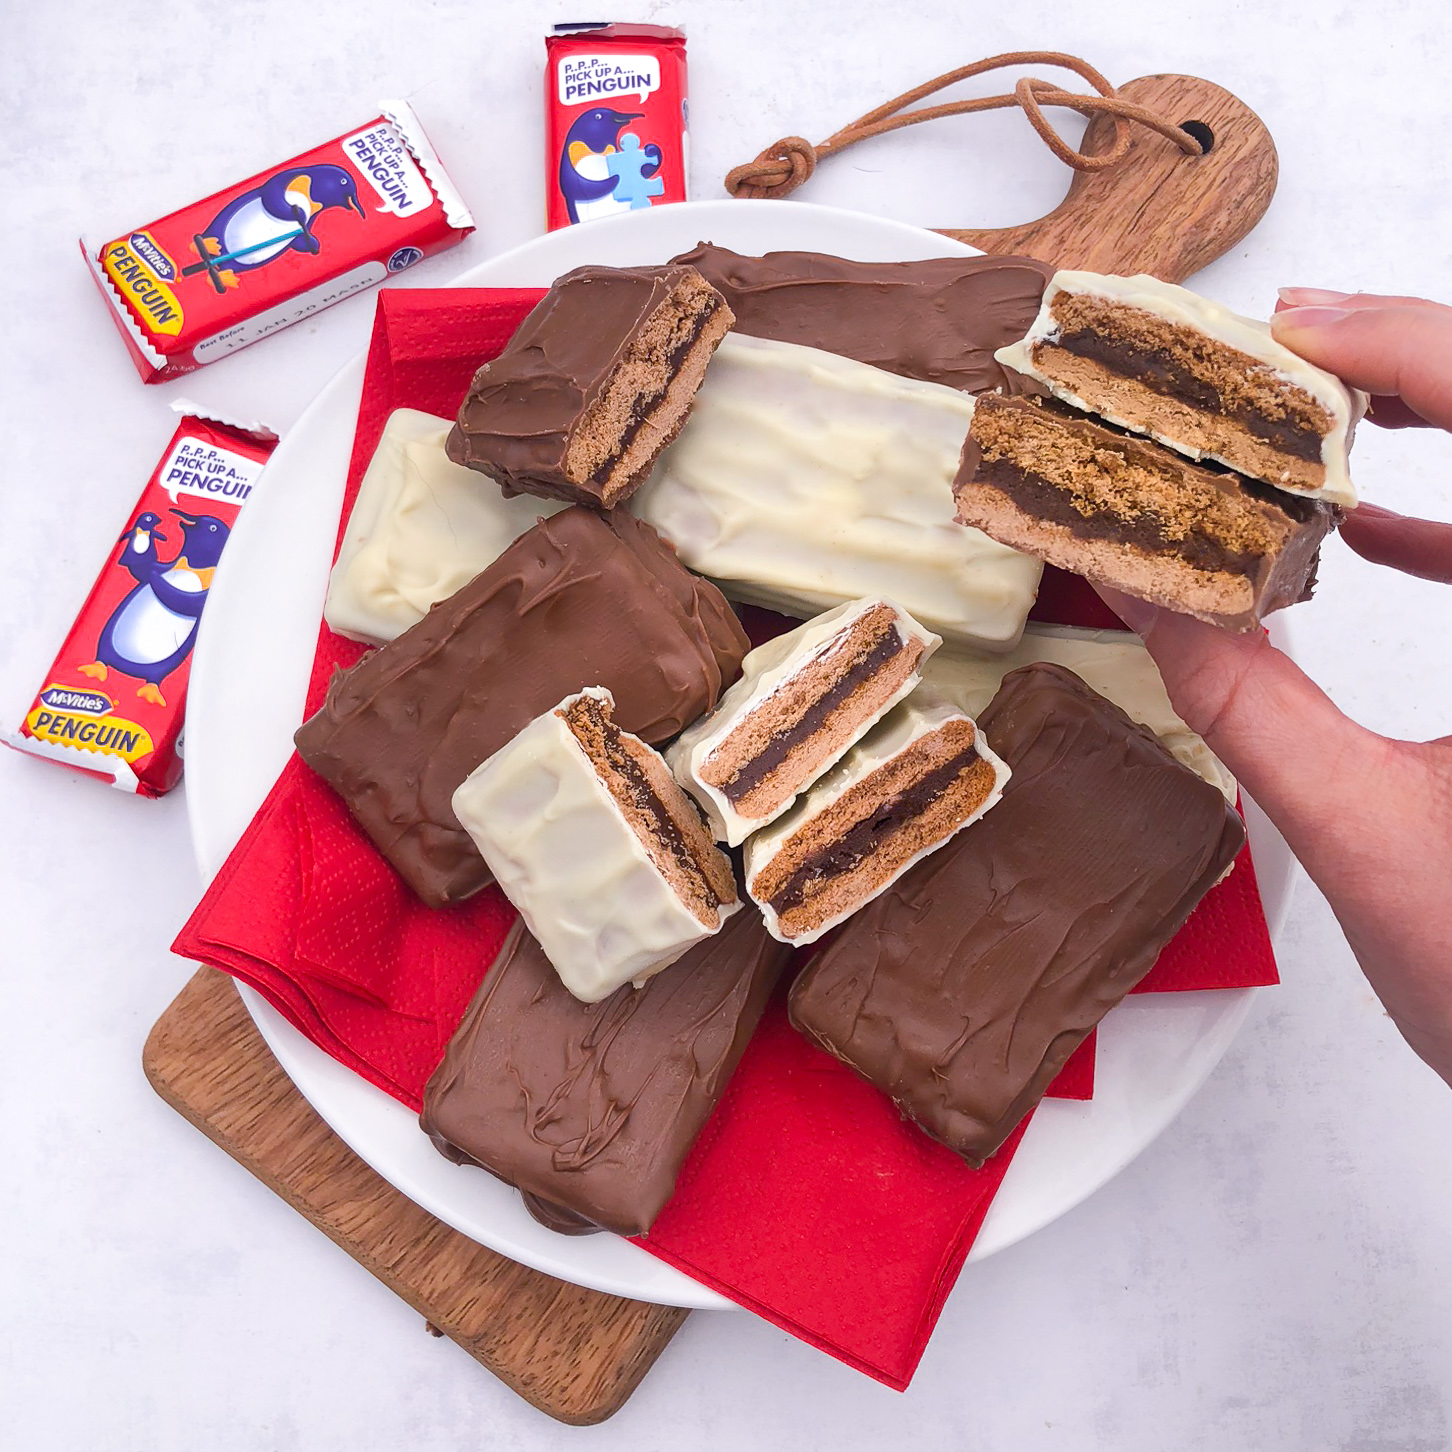
When did the “real” Penguins shrink?!
As a side note, here’s my Penguin vs the real deal. When did all of our fav childhood sweets shrink so much?!!! I’m sure Penguins used to be bigger than this. Or were my hands really that tiny?!!!

The only advantage the one on the right has is that it comes with a good dad joke. Although I’m sure my dad could offer up a few of those if you feel like you’re missing out! And if not, I actually googled “gluten free dad jokes” and found this. Yes, I have too much time on my hands!!
Want some more choc bar recreations?
If you have any other childhood classics you’d like to me recreate, please message me on Instagram or send an email via the Contact Me page on here!
Jess x


