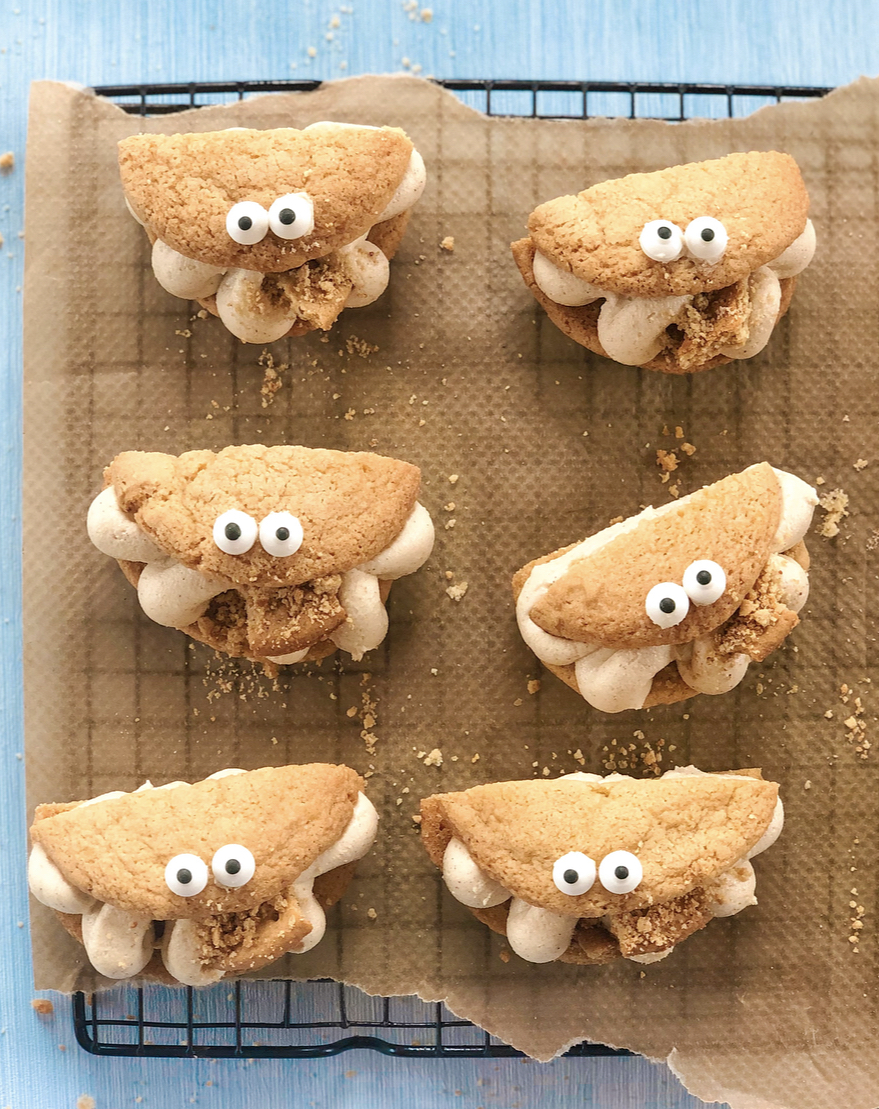
Cookie Monster Cookies!

Charlie and I saw some “Cookie Monster Cookies”has in a little cake shop in Bakewell and the big kid inside me INSISTED I made my own version – gluten & dairy free too, of course! So much fun to make and even more fun to eat!!
You only need 8 basic ingredients, a wooden spoon/spatula, a bowl, a piping bag and something for eyes and you can make this…

Also, play around with the flavour of the butter icing, cookie and biscuit in the Cookie Monsters mouth!! Add choc chips, choc sauce, caramel sauce, whatever you fancy… the ones in my pictures are actually apple pie flavoured because I had some leftover apple pie butter icing (cinnamon & all spice flavoured) in the fridge, as you do.
This recipe is definitely all about fun!
The Eyes!!
- You can get these eyes from most supermarkets (weirdest thing I’ve ever written) in the cake decorating section or Amazon.
- If you’re struggling to get hold of them, they’d also look great with little gems or mini marshmellows!!
- Double check the ones you’re buying are gluten free.
Dairy free Baking:
There’s tons of info in my guide to being dairy free here, but for these Cookie Monster Cookies, all you need to know is that you need:
(1) Stork – comes in paper, like this. Its dairy free!!
(2) Spread for the icing – Flora Dairy free, Pure & Vitalite will all work perfectly. They can all be purchased from your local supermarket. Even the small stores have it these days!

Cookie Monster Cookies!
Ingredients
- 300 grams gluten free plain flour
- 120 grams Stork – comes in block - wrapped in paper. This is dairy free.
- 90 grams caster sugar
- 110 grams light brown sugar
- 1 tsp salt
- 1/2 tsp baking soda
- 1 egg
Construction
- 150 grams icing sugar
- 150 grams dairy-free spread e.g. Flora dairy free
- 14 sets of eyes! - See note above
Instructions
- Melt the butter in a pan, on a very very low heat!
- Pour the butter into a mixing bowl with caster & light brown sugar and mix with a wooden spoon/spatula until fully combined. Should take about a minute.
- Crack the egg into the same bowl. Mix together until just combined. Set aside.
- Put the flour, salt and baking powder into another bowl. Stir with a spoon so that its all evenly mixed together.
- Add the flour to butter/sugar mixture & stir until fully combined. Note – It will look like a lot of flour! Keep stirring and it’ll all come together. Promise!

- Cover with cling film and place into the fridge for at least an hour.
- Remove from the fridge and divide into 14 balls – about golf ball sized.>The mixture should not be too sticky at this stage. If it is, place it back in the fridge to firm up.
- Place onto baking parchment on a baking tray, leaving lots of room around them. Put into the oven for 12-15mins at 175oC until the edges are browning but the middles are still gooey.
- Remove from the oven and carefully cut them down the middle – just off centre like my picture. Leave to cool on the baking tray for at least 10-15mins before attempting to move them – they are VERY fragile when warm but they harden up once they start to cool.

Construction
- Once completely cool, whisk the butter and icing together until pale and smooth. Takes approx 3-4mins.
- Place the icing into a bag & pipe like my picture on the larger half of the cookie.

- Sandwich the other half on top, at a slight angle so it looks like a mouth!
- Stick on some eyes with a tiny bit of butter icing – I think they look better if they're close together, like the Cookie Monster!
- Eat!!!!

