Gluten Free Mini Egg Millionaire Shortbread
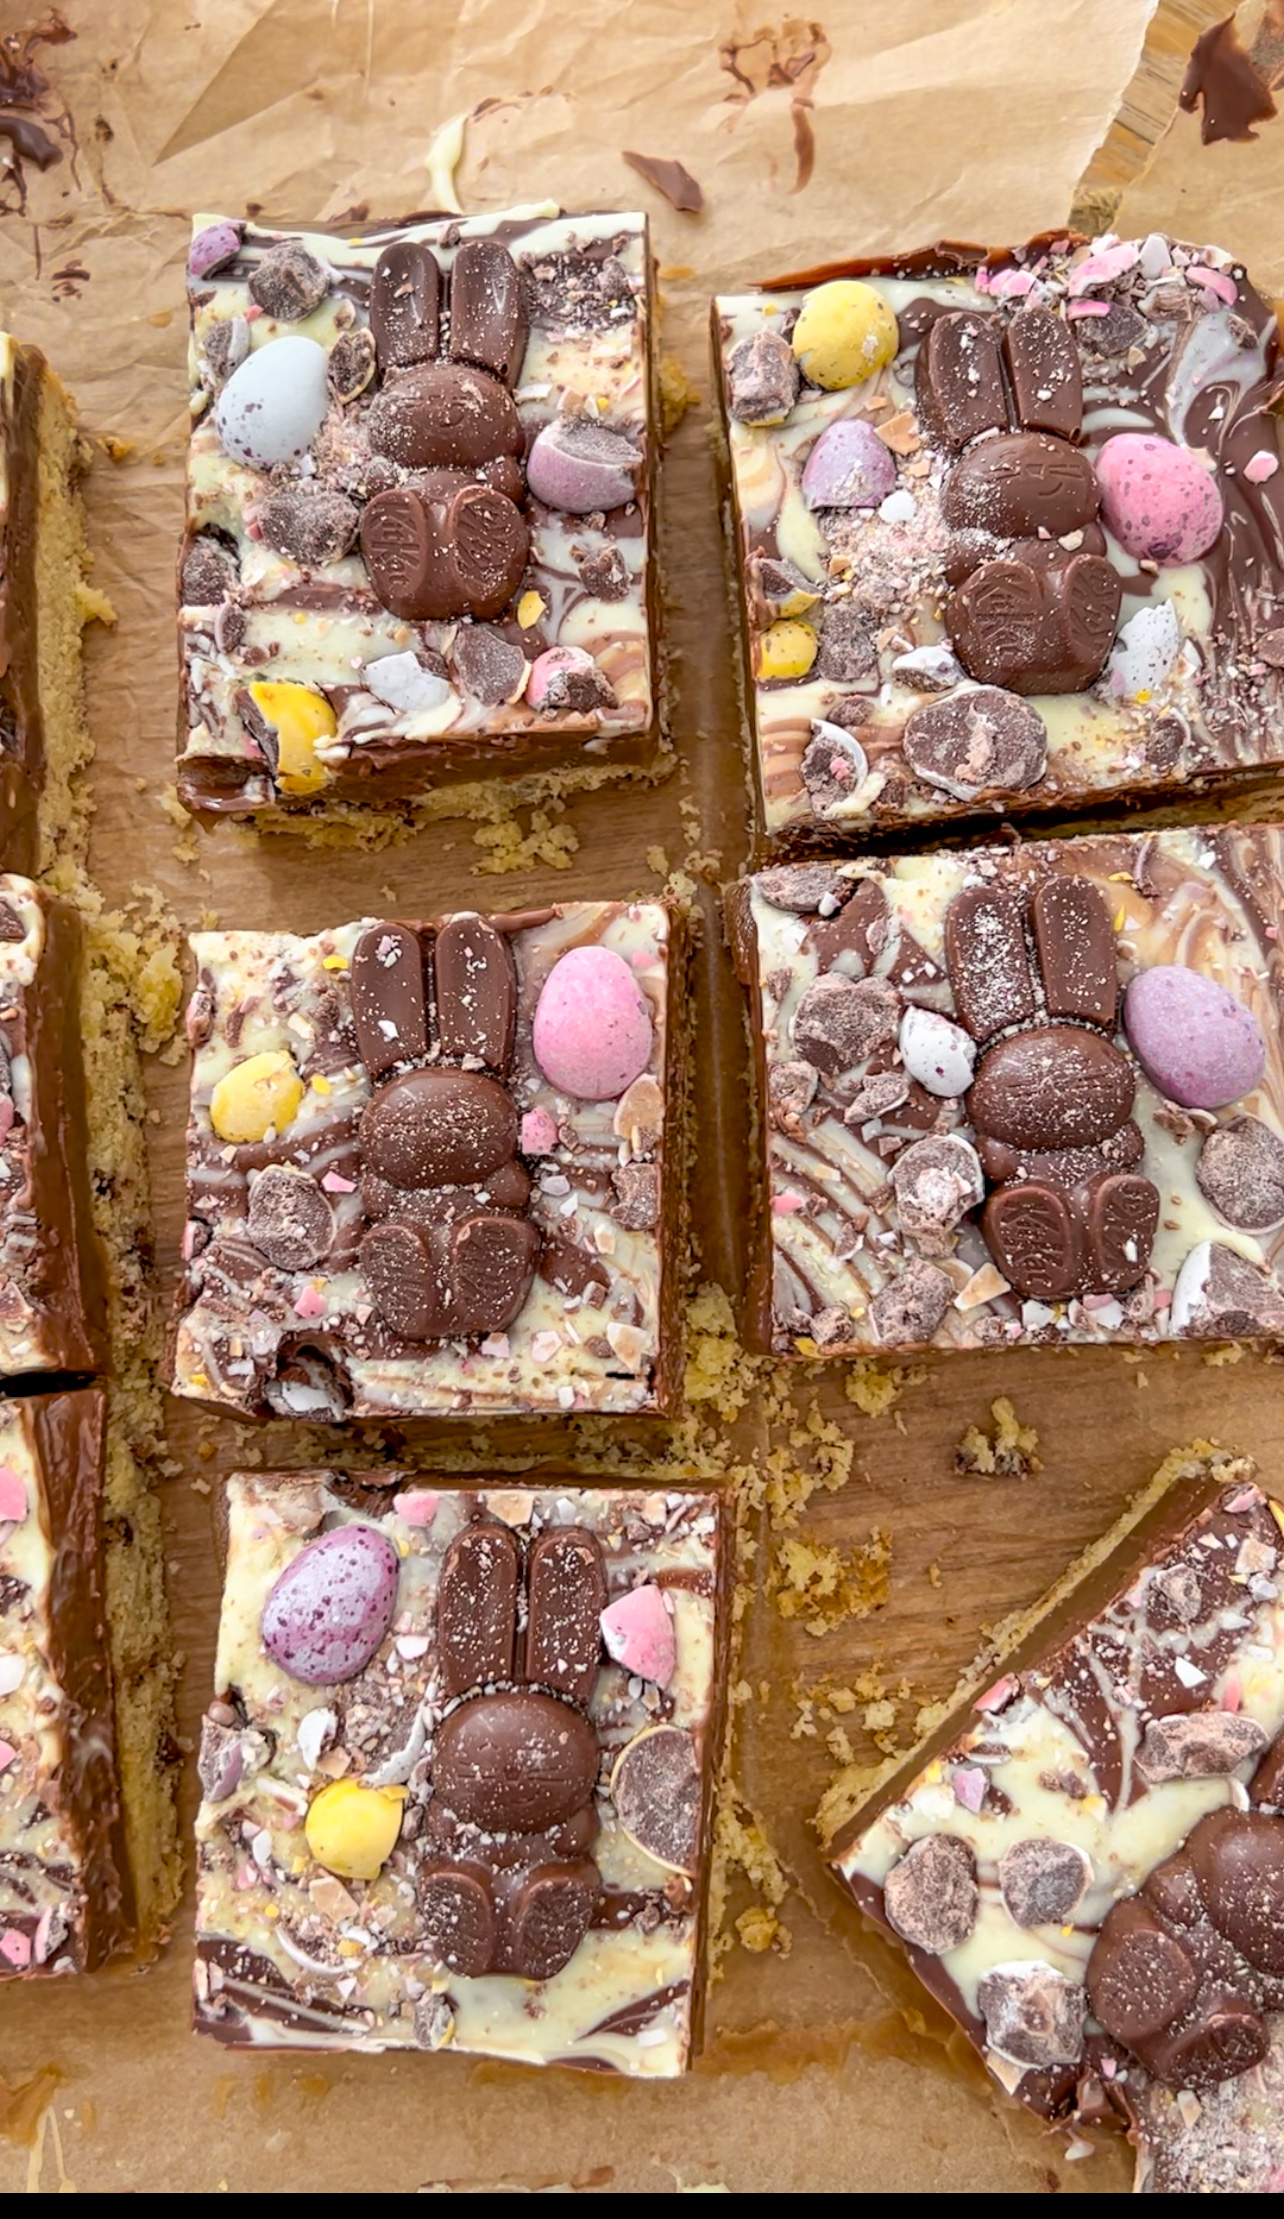
My classic Gluten Free Millionaire Shortbreads with an Easter twist… Mini Eggs!!! I’ve sprinkled mini eggs into a buttery & ever so slightly crumbly shortbread and topped it with a deliciously rich caramel. I’ve then topped it with chocolate and scatter with more Mini Eggs.
You’d never, ever know it gluten free and its actually easy to make.


Ingredients for my Gluten Free Mini Egg Millionaires
They’re all basic and easy to get hold of but I recommend you have a quick of this prior to making my gluten free millionaires!
(1) Gluten Free Flour
- Self-raising is my preference but if you’ve only got plain flour in the cupboard, it’ll still work.
- Brand: I like Doves Farm FREEE
(2) Stork Block
- The block of Stork in the picture above is the best if you can get it (you want the one that comes in 250g foil block, NOT a tub, and it says “biscuits and pastry” on the front)
- Stork is naturally dairy free too!!
- If you can’t get Stork:
- You can buy alternative brands but it has to be a vegetable oil based block. Make sure the ingredients states “vegetable oil” (usually 75%). The packet will likely say something like “baking block for biscuits”.
- Don’t substitute with a block of real butter e.g. Lurpak (which is made of milk, not oil) because the results will be very different!!
(3) Caster Sugar
- White granulated sugar would be fine too. Or golden caster sugar (will just result in a slightly browner shortbread)
(4) Chocolate
Any chocolate you like! You can use a combination of any flavours too.
(5) Butter
Preferably a block like Lupak but spread will also work. Its for the caramel layer so salted or unsalted will work – totally up to you!
(6) Dark Brown Soft Sugar
This gives a lovely rich caramel taste. Light brown sugar will also work but the colour of the caramel will be paler.
(7) Condensed Milk
A 397g tin of any brand of condensed milk will work but DONT buy the light/low fat one!!
(8) Mini Eggs
Yes, they’re gluten free!!!! You could use any Easter chocs you fancy – I’ve snuck a few Kit Kat bunnies onto mine too (yes, they’re gluten free as well!). Inspiration for more chocs here in my Easter Chocolates Guide.

FAQs for my Gluten Free Millionaires
Q. How do I know when the caramel is done?
A. I think its easiest to tell by timing – if you let the sugar completely melt in the butter and then stir in the condensed milk on a low temperature for 30 seconds, it’ll be perfect. It will look pretty thick whilst on the hob – “just a bit thicker than custard” is what I say to people! It’ll then set even firmer when cool.
If you’re super nervous, when you think its ready, take a tsp of the caramel and stick it into a cup of freezing cold water for a few seconds then bring it out. That will show you the consistency it’ll be once its cooled down. You should be able to mould it into different shapes in your fingers and it should hold that shape. If it doesn’t hold its shape at all, it needs to simmer for a little longer – try another 15 seconds, stirring continually.
Some people like to cook it down even more which produces more of a fudgy caramel. Neither are wrong, I just like it to still be a little sticky.
Q. Can I use a tin of a caramel rather than making my own with condensed milk?
A. NO!!! It wont be thick enough and it doesn’t set (hold its shape) so it’ll just run everywhere and create a mess!
Q. How long will they keep?
A. In my house, 20 seconds and they’ve all be scoffed. But if you want to, they’ll keep 3-5 days in an airtight container or several months in the freezer. Chop them into squares before freezing.
Q. How do I cut them neatly?
This is the ONLY way I cut them into squares and it works every time.
- Boil the kettle
- Pour the water into a large jug/glass.
- Place the sharpest knife you have into the water
- Leave for 30 secs for the knife to warm up
- Take the knife out, quickly dry it off and cut your millionaires VERY slowly and carefully.
- After you’ve made a few cuts, the knife will be cool again so clean it off & place back into the boiling water to heat up again
**GOT ANY MORE QUESTIONS? DM me and I’ll answer asap :)**
Gluten Free Mini Egg Millionaire Shortbread
Ingredients
Shortbread
- 200 grams Stork block
- 305 grams gluten free self-raising flour – can also use gluten free plain flour
- 95 grams caster sugar
- 1 x 85g bag of Mini Eggs
Caramel
- 150 grams dark brown soft sugar
- 150 grams butter
- 397 grams condensed milk – this is 1 tin - 14oz
Topping
- 300 grams chocolate of your choice
- 1 x 85g bag of Mini Eggs/any other chocolates you'd like
Instructions
- Pre-heat your oven to 160oC (fan)
- Line your baking tin with baking paper/foil.
- Cut the Stork into rough squares and place into a mixing bowl. Add the caster sugar to the bowl too. >We cut the Stork into smaller pieces to make it easier to whisk at the next stage

- Cream the Stork & sugar until smooth and fluffy. >Ideally, mix with an electric hand whisk for about 30 seconds. Don't cut this time short because (1) it creates a creamy shortbread and (2) it warms up the butter which makes the next stage easier! >You could also use a wooden spoon but you'll have to really go for it!!
- Add the flour and whisk again. It'll start resembling breadcrumbs like the first picture. Keep whisking and it will then form bigger lumps like the second picture. Stop at this point! >Don't worry about sieving the flour – just tip it in >There should be no white flour showing by the time you've finished this stage, it should be all mixed in

- Take 1 bag of mini eggs and bash into small pieces>I do this in the original packaging or a sandwich bag and bash it with a rolling pin.>The pieces need to be quite small so they don't get in the way when you're cutting your Millionaires. You can see the size in this picture.

- Add them to the dough and mix around.
- Next you need to get the dough into the bottom of your baking tin. It won't look like there's enough but I promise there is!! The best way I find to do this:A. Use your hands to press the mix together into a 4 balls. Be quite heavy handed with it!B. Flatten the balls a little with the palm of your handC. Place the 4 pieces into the 4 corners of a baking tin.D. Push the dough around so its roughly evenly spread across the bottom of the tin. You can use your fingers or the back of a spoon. Be FIRM with it to make sure its properly packed down. Don't worry about being too neat.It should look something like this now.

- Time to neaten it up! Use the back of a spoon to smooth the shortbread out. Focus on the edges – as you can see in the picture above, they’re often crumblier looking and creeping up the sides! Push them down and make it nice and neat.

- Use a fork to poke some air holes across the shortbread
- Place the tin into the oven for 20-25mins, until it starts to brown (like the picture). >Top tip for older ovens: after 10 mins, turn the tin round to cook the shortbread more evenly.

- Remove from the oven and set aside. You can move straight onto the caramel! No need to wait for it to cool.
Caramel
- Add the brown sugar and butter to a pan. Melt on a low temp, stirring constantly until all the sugar has dissolved. >Don't rush this step – make sure the sugar is full dissolved. If not, you'll end up with a grainy millionaire.

- Add a little bit of the condensed milk and stir until fully mixed in. Add more, mix in. Repeat until all of your condensed milk is incorporated
- Bring to a gentle simmer for 30 seconds, stirring constantly still. >It should look like a thick caramel now (a bit thicker than the consistency of custard).
- Pour the mix straight onto the shortbread. Place into the fridge to cool. >You can also leave to cool for an hour at room temperature if your fridge is full!

Add the Chocolate
- Once the caramel is cool and quite firm to the touch, melt your chocolate. >"firm to the touch" means when you slightly press the top, your finger makes a little dent in the caramel, a bit like it would if you poked a ball of blue tak. If your finger just sinks straight in and doesn't leave any mark, its not set enough yet. You can also tell by the temperature – if its cool, it should be good to go! >I do this by placing the squares of chocolate in a mixing bowl, onto a pan of gently simmering water. Stir constantly and make sure you pick a pan/mixing bowl combo where the base of the mixing bowl will not touch the boiling water otherwise the chocolate will burn.
- Pour your milk chocolate over the caramel and spread it out so it covers the caramel. >Top tip: as soon as the chocolate hits the cool caramel, it will start to cool. I find it easier to pour the chocolate slowly all over the caramel rather than in one spot so its easier to spread. >Spread carefully! You don't want to dig down to the caramel layer. I just use a spatula with very little pressure (almost brushing over the top of the chocolate).
- Drizzle the white chocolate over the milk chocolate in a random pattern.

- Use a skewer/end of a spoon to make swirly patterns ontop.

- Add more bashed Mini Eggs/any other chocolate you'd like to the top.
- Tap the tin gently on the worksurface to flatten out the chocolate >Because its cooling, the white chocolate might be sitting ontop of the milk chocolate, looking like its almost raised. If you tap the tin on the side, it'll all be the same level again
- Place in the fridge for an hour to set.
- Cut your millionaires into squares! Tips for how to do that below.
Notes
- Boil the kettle
- Pour the water into a large jug/glass.
- Place the sharpest knife you have into the water
- Leave for 30 secs for the knife to warm up
- Take the knife out, quickly dry it off and cut your millionaires VERY slowly and carefully.
- After you’ve made a few cuts, the knife will be cool again so clean it off & place back into the boiling water to heat up again

